
PETG Shrink Film Problems: Defects, Causes & Fixes
How the common PETG shrink-sleeve defects arise across tunnel type, tension, temperature, and film grade — and how to diagnose, fix, and prevent each on the production line.
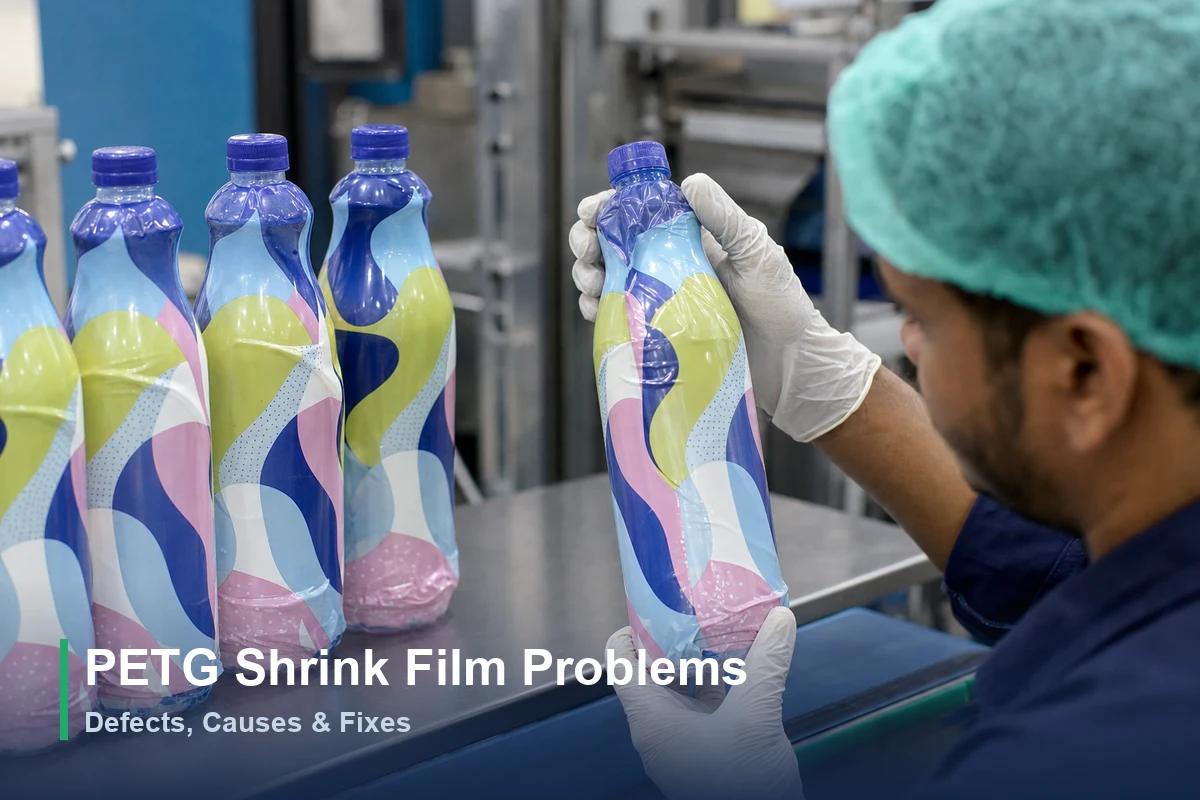
PETG shrink film is the glycol-modified PET material printed and seamed into full-body sleeve labels and tamper-evident bands, and its defects are best understood as a single material reacting to mismatched conditions. The film carries stored orientation that releases as heat lifts it toward its softening range; whenever heat, application tension, container geometry, or film grade fall out of alignment, that release goes wrong and a recognizable defect appears on the sleeve. Five defect families account for nearly all of them: bubbling and fisheyes, tearing and cracking, incomplete shrink, wrinkling and uneven shrink, and graphic distortion.
Key takeaways
- Steam transfers heat into film more efficiently than hot air, which is why steam tunnels run lower set points and handle complex curves more forgivingly than dry-heat tunnels.
- A film grade chosen with too little transverse-direction shrink cannot be rescued with extra tunnel heat, so grade selection — not line tuning — decides whether a deep contour will ever seat.
- Graphic distortion is intrinsic to the format and is corrected in prepress, never on the line, by pre-warping artwork against measured TD/MD ratios.
- Absorbed storage moisture is a leading upstream cause of bubbling and fisheyes, which is why sealed, dry, climate-held stock matters before any tunnel tuning.
- A short shrink sample run against the actual container catches grade and registration mismatches before they become scrap at volume.
Why PETG shrink defects happen: heat, tension, geometry, film grade
Nearly every sleeve defect traces back to one of four variables, and identifying the variable first is faster than reacting to the symptom. Heat supplies the energy that releases shrink; application tension sets the film’s mechanical state before heat arrives; container geometry decides where the film must travel furthest and where stress concentrates; and film grade fixes the ceiling and direction of shrink available in the first place. A blister points toward heat and moisture, a split points toward tension and geometry, a loose sleeve points toward heat, dwell, or grade, and a warped graphic points toward prepress compensation. Treating the variable rather than the symptom keeps line adjustments from cancelling each other out. Raising tunnel temperature to chase incomplete shrink, for example, will often start producing bubbles if the real fault was dwell time or grade selection.
The five defect families map to a short diagnostic table that points each symptom at its most likely variable and the corrective move that follows:
| Defect | Likely cause | Fix |
|---|---|---|
| Bubbling and fisheyes | Tunnel set too hot, uneven heat distribution, conveyor too fast for trapped air to vent, or film that absorbed storage moisture | Lower the set point in 2–3°C steps, balance airflow or steam distribution, slow the conveyor, and keep rolls sealed and dry until they reach the line |
| Tearing and cracking | Application tension too high (or too low), stress concentration at shoulders and faceted edges, film too thin for the contour, or local embrittlement from overheating | Trim applicator tension to the minimum that places the sleeve cleanly, match thickness to the deepest contour within 30–60 μm, and ramp heat gradually across zones |
| Incomplete shrink | Set point too low, dwell time too short, conveyor too fast, or a grade whose transverse-direction shrink ceiling sits below what the container demands | Confirm the grade’s TD figure against the deepest taper first; if the grade can reach it, add heat, extend dwell, or slow the line |
| Wrinkling and uneven shrink | Asymmetric heat across zones, off-center or skewed sleeve placement, stray external air currents, or unequal steam pressure between the two tunnel sides | Use independent multi-zone control, balance airflow or steam distribution, close off stray drafts, and center the sleeve before it enters heat |
| Graphic distortion | Intrinsic to the format — printed film changes dimension as it conforms — not a line fault | Compensate in prepress: pre-warp artwork against measured TD/MD ratios and verify with a printed grid sample before the run |
Steam versus hot-air tunnels: how the shrink channel shapes defects
The heating medium shapes which defects a line tends to produce, so tunnel type belongs in any diagnosis before parameters are touched. Steam delivers heat by convection and condensation across the whole container at once, and because water transfers heat roughly twenty times more efficiently than air, steam channels run lower set points while wrapping heat uniformly around deep curves and recessed panels. That uniformity makes steam the common choice for contoured bottles and tight-registration sleeves. Hot-air tunnels apply dry convection and must run much hotter to move equivalent heat into the film, which biases their failure modes toward the leading edge: the front of the sleeve over-exposes while a shaded panel lags, producing fisheyes and graphic distortion on complex shapes. Dry heat does suit moisture-sensitive contents and powders that a steam environment would compromise. One distinction prevents most misreads on either tunnel — the air or steam temperature shown on the controller is not the film’s surface temperature, which lags the channel and varies by dwell and conveyor speed, so set points should be read as inputs to tune rather than the temperature the film actually reaches.
Bubbling and fisheyes: causes and fixes
When the film fails to lie flat against the container, the result is bubbling or fisheyes — surface defects that almost always come from a heat or moisture mismatch rather than the film itself. Excess tunnel temperature drives trapped air and absorbed moisture to expand faster than they can escape, raising blisters across the panel. Fisheyes form when warm, already-softening film contacts a cold container wall before it has conformed, locking a dimple in place. In steam channels a related “wet” haze appears when condensate is trapped under the film, though that moisture typically flashes off as the sleeve clears the tunnel. The corrections share a logic of giving the shrink front more time and a gentler gradient: lower the set point in small two-to-three-degree steps, slow the conveyor so air vents ahead of the shrink line, and balance airflow or steam distribution so no single zone spikes. Upstream, film that arrived dry stays out of trouble, since a roll that absorbed humidity in storage will blister no matter how clean the tunnel profile is.
Tearing and cracking: tension and geometry
Tearing and cracking are mechanical failures, and they cluster at the two extremes of how the film is held and where it is asked to travel. Too little application tension lets the sleeve sag and fold before heat arrives, while too much pre-stresses the film so that the added shrink stress splits it; both ends of the tension range raise the failure rate. Geometry concentrates that stress at sharp shoulders, handle cut-outs, faceted edges, and abrupt neck transitions, where the film must pull in hardest over the shortest span. Overheating compounds the problem by embrittling the film locally before it has finished conforming. The fixes work the stress down from several directions: trim applicator tension to the minimum that still places the sleeve cleanly, choose a thickness matched to the container’s deepest contour within the typical 30–60 μm range, and ramp heat gradually across zones so the film conforms progressively instead of snapping into a deep recess all at once. Bidirectional grades that shrink in both axes can also spread stress more evenly across irregular geometries.
Incomplete shrink: temperature, dwell, and grade selection
Incomplete shrink is when the sleeve stays loose or fails to seat into a recess, and it resolves into three checkable causes: too little heat, too little time, or too little shrink designed into the grade. A set point below what the film needs, a conveyor running too fast to give adequate dwell in the channel, or airflow that skips a panel all leave shrink on the table. Grade is the one cause no line setting can override. Every grade carries a transverse-direction ceiling, and a deeply tapered or contoured container that demands high travel will never seat with a low-shrink grade no matter how hot the tunnel runs. This is where PETG’s headroom matters — its TD shrink ceiling near 75–80% reaches well past the 50–60% range typical of PVC, as the broader PETG versus PVC shrink film comparison details, which is why deep contours are a PETG application in the first place. Confirm the grade’s TD figure against the deepest part of the container before adjusting the line, because tuning heat and speed only helps once the grade can physically reach the required shrink.
Wrinkling and uneven shrink: heat distribution and label placement
Folds, creases, or one side of the sleeve seating before the other are the visible signs of wrinkling and uneven shrink, and the root cause is almost always asymmetry in how heat or the sleeve itself is delivered. Uneven heat distribution across tunnel zones lets one panel shrink ahead of its neighbor and gather slack into a wrinkle. A sleeve placed off-center or skewed on the applicator starts the shrink from an unbalanced position that no amount of heat will pull straight. External air currents matter more than they appear — a nearby fan or an open door pushing drafts across the tunnel mouth disturbs the gradient, so closing off stray airflow is a real fix. On steam channels, unequal pressure between the two sides of the tunnel or a partially blocked steam manifold delivers more heat to one face than the other. The corrections target symmetry directly: independent multi-zone temperature control, balanced airflow or steam distribution, and a calibrated, centered placement step before the sleeve enters heat.
Graphic distortion: why it is unavoidable and how compensation works
Graphic distortion is the warping of printed artwork after shrink, and unlike the other defects it cannot be tuned out on the line because it is intrinsic to a format where the printed film changes dimension as it conforms. A logo printed flat will always deform once the film travels more than 70% in one direction around a curved container; the only question is whether the deformation was anticipated. Compensation lives entirely in prepress. A 3D model of the container drives a simulation of how each region of film will move, which produces a distortion map that pre-warps the artwork in the opposite direction so it reads correctly after shrink. Because shrink differs along the transverse and machine directions, the warp is applied unevenly against the measured TD and MD ratios of the specific grade. A printed grid sample — a regular checkerboard shrunk on the actual container — calibrates and verifies the map before the run commits, and matching artwork to the press process is part of getting it right, which is why distortion work pairs closely with the printing method chosen for the job. Distortion-compensation software handles the mapping; the discipline is supplying it accurate film ratios and container geometry.
Matching film grade to bottle geometry
Grade selection is the upstream decision that prevents incomplete shrink and tearing before they reach the tunnel, and it comes down to matching shrink ceiling and direction to the container. Standard clear and white PETG, along with recycled-content RPET, reach a transverse-direction shrink of ≥75% with machine-direction movement held to ≤3.0%, which suits the majority of full-body sleeves on contoured bottles where nearly all travel is around the container. White grades add light-blocking opacity, carrying haze ≥100% and transmittance ≤30% for dairy and light-sensitive contents, while holding the same shrink profile. CPET shrinks at 74±2% TD with a higher 230°C melting point that opens a wider process window, giving deep-draw and high-speed lines more margin before heat damage. Bidirectional grades shrink ≥70% TD with a deliberate 35±5% in the machine direction, so the film pulls in along both axes — useful for irregular geometries and for labels engineered to detach during bottle washing, a behavior covered in the shrink sleeve recyclability discussion. Across grades, thickness spans 30–60 μm: deeper contours and sharper edges favor the heavier end for stress tolerance, while high-speed lines lean on tight thickness consistency so every sleeve sees the same heat. The optical side of grade choice — clarity, haze, and how the film carries print — is examined further in the transparent label film performance overview.
Prevention over troubleshooting: storage, sampling, and shrink testing
Most shrink defects are prevented upstream of the tunnel, and prevention rests on three habits. Storage comes first: PETG slowly absorbs ambient moisture, and a roll held in humidity will fisheye and blister regardless of tunnel tuning, so stock belongs at 10–30°C in a dry, dark space inside sealed packaging, worked through within roughly a twelve-month window. Incoming verification comes second — confirming that the grade’s documented TD and MD figures match the container before a line ever runs catches the grade mismatch that causes both incomplete shrink and tearing. A Certificate of Analysis travelling with each shipment makes this check possible, since it records the shrink curve before the film reaches heat. The third habit is a short shrink test against the actual container before committing volume, checking that the sleeve seats fully, that registration holds under the shrunk dimensions, and that perforations behave. The run that proves the grade and the profile together is what keeps line-side troubleshooting from ever starting.
Selecting a grade by its measured TD and MD ratios against the container’s deepest contour resolves most shrink defects before the tunnel is even involved. We support that selection at the source: every production batch is sampled — at least five metres pulled for shrinkage, thickness uniformity, haze, and tensile testing — and each shipment carries a Certificate of Analysis stating the measured shrink curve, so the film’s behaviour is known before it meets heat. Rolls run without splices, removing one of the recurring weak points that seeds tearing on the line. See the PETG shrink film grades and their documented shrink specifications to match film to geometry, or share the container shape and required shrink for a grade recommendation.
Frequently Asked Questions
Why does PETG shrink film bubble during the shrinking process?
What causes a PETG shrink sleeve to tear or crack?
How is incomplete or low shrinkage on PETG sleeves corrected?
Can graphic distortion on shrink sleeves be eliminated entirely?
Does film storage really affect shrink defects?
Related Articles
Light-Blocking Shrink Sleeves for Light-Sensitive Fills
Beer, dairy, supplements, and some medicines degrade under light. Which fills need protection, and how a full-body opaque PETG sleeve wraps the whole container to keep light off the contents.

Plastic Packaging Tax and Shrink Film: The 30% Rule
How plastic packaging taxes in the UK, Spain, Italy and the EU treat shrink sleeves, why the 30% recycled-content threshold is the number worth remembering, and how RPET film helps a sleeve cross it.
Need Expert Advice on Shrink Film?
Our technical team can help you choose the right film for your application.
Contact Us